Installing Solar Thermal Hot Water: A UK Homeowner Guide
A practical guide to installing solar thermal hot water panels in the UK, covering roof checks, costs, installer questions, and realistic project timelines.
- Written by
- Net Zero Home Scheme editorial team
- Last updated
- Topic
- solar thermal, hot water, home energy

Solar thermal panels absorb heat directly from sunlight to heat domestic hot water, offering a dedicated way to lower water heating bills. While solar photovoltaic (PV) systems generate electricity, solar thermal technology uses solar collectors mounted on your roof to heat a water-and-glycol fluid. This fluid circulates through a heat exchanger coil inside a specialized hot water cylinder, providing up to 60 percent of a home's annual hot water demand according to data published by the Energy Saving Trust.
Deciding whether to install solar thermal requires assessing your property, your existing heating setup, and your household hot water usage. This practical guide sets out the physical requirements, typical costs, essential installer questions, and the timeline you can expect when upgrading your home.
Assessing your home for solar thermal
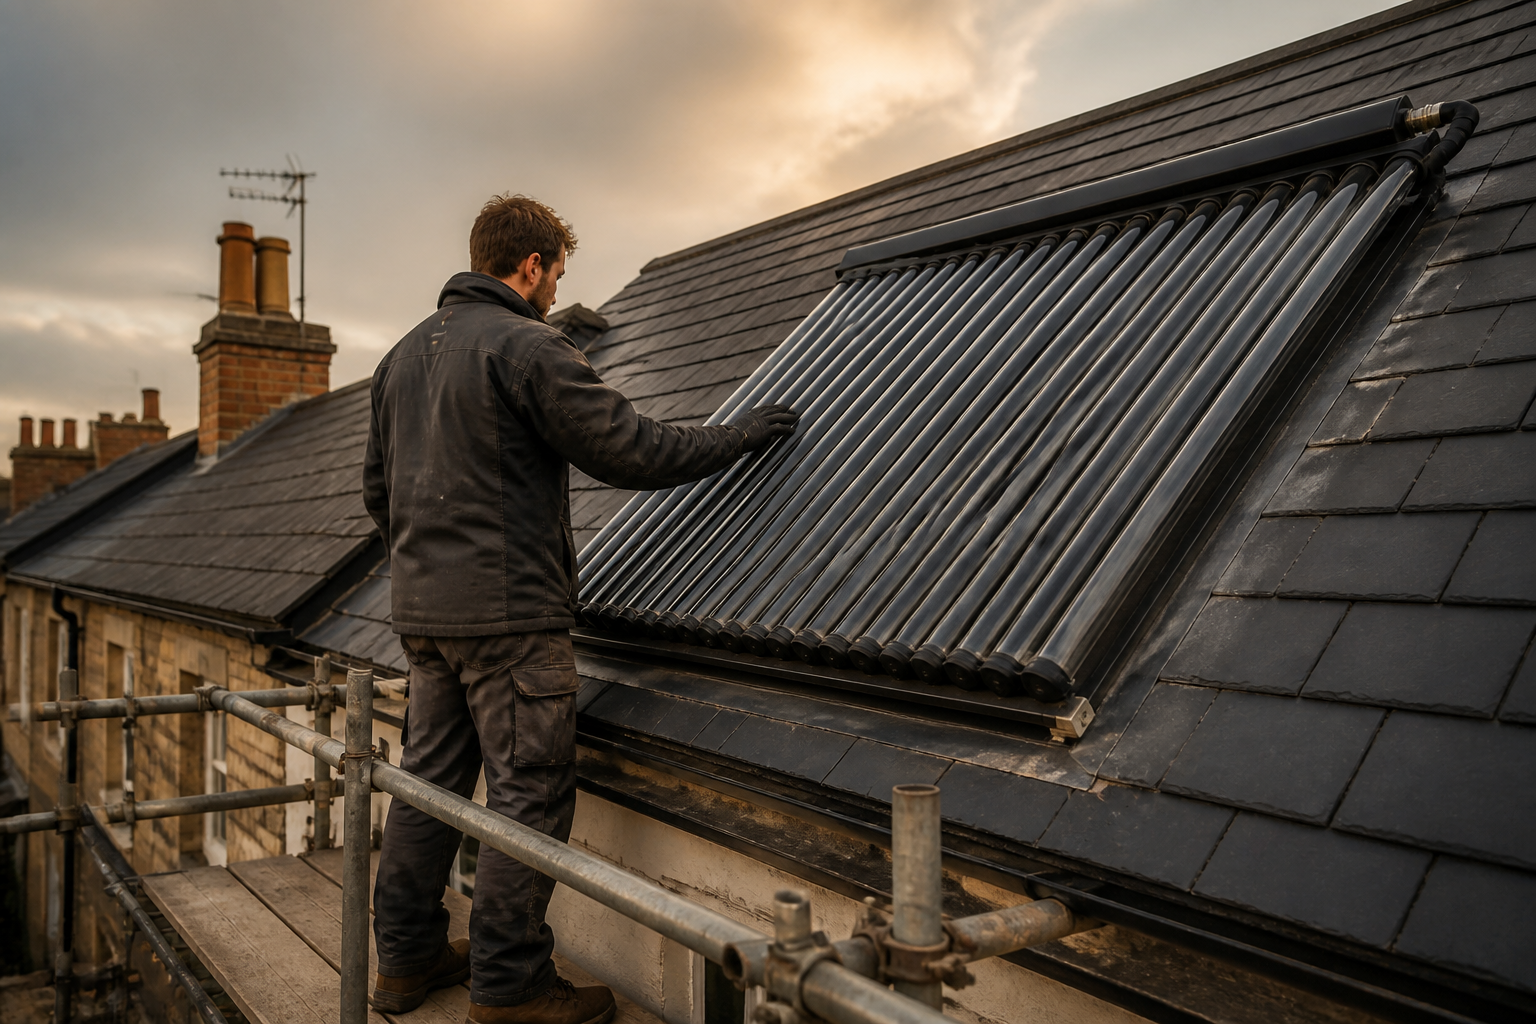
Before requesting quotes, you need to verify that your roof and internal plumbing can support a solar thermal collector system.
Solar thermal panels perform best on unshaded roofs pitched between 30 and 50 degrees, facing between east and west through south. South-facing roofs yield the highest energy output throughout the year, but east-west configurations are also effective if sized correctly. Because water transfers heat quickly, solar thermal requires less roof area than solar PV. A typical domestic system requires between 2 and 5 square metres of collector area depending on household size.
You must also check your hot water storage system. Solar thermal systems require a dedicated solar hot water cylinder with two internal heat exchanger coils. The bottom coil connects to the solar thermal roof loop, while the top coil connects to your conventional boiler or immersion heater as a backup. If you currently have a combi boiler without a cylinder, or an older single-coil cylinder, you will need to replace or add a cylinder to store the solar-heated water.
Solar thermal system costs and expected savings
The total cost of a domestic solar thermal installation varies based on the collector type, roof access requirements, and whether you need to upgrade your hot water cylinder.
According to guidance from the Energy Saving Trust, a standard 3.6 square metre solar thermal system for a three-bedroom house costs between £3,000 and £5,000 including installation and standard scaffolding. There are two primary collector types:
- Flat plate collectors: Dense, dark panels fitted into an insulated metal casing with a glass cover. They are durable, sit relatively flush with the roofline, and are generally less expensive upfront.
- Evacuated tube collectors: A bank of parallel transparent glass tubes containing vacuum-sealed heat pipes. They offer higher thermal efficiency in colder or overcast conditions and require less roof surface area, though they cost slightly more to manufacture and install.
Financial savings depend heavily on the fuel you are replacing. Replacing an electric immersion heater or an oil boiler yields higher annual bill reductions than replacing a modern mains gas boiler. In addition, solar thermal panels require minimal electrical power, using only a small circulation pump that draws around 20 to 40 watts when active.
What to ask a potential installer
Selecting a qualified installer ensures that your system operates safely, efficiently, and in compliance with UK Building Regulations. Use this checklist during your initial consultation:
| Assessment Area | Question for Installer | What to Look For |
|---|---|---|
| System Sizing | How many square metres of collector area do I need for my household size? | Calculations matched to daily hot water demand rather than roof space alone. |
| Cylinder Compatibility | Will my current cylinder work, or do I need a twin-coil dual-fuel cylinder? | Clear explanation of heat exchanger coil placement and expansion vessel sizing. |
| Pipework and Access | How will insulated solar pipework be routed from the roof to the cylinder? | High-temperature twin-pipe insulation specified to prevent thermal loss. |
| Controls and Sensors | What differential temperature controller will be installed? | Automated controller that turns on the pump only when collector heat exceeds cylinder temperature. |
| Maintenance Requirements | What is the recommended fluid check and servicing schedule? | Glycol antifreeze checks every 3 to 5 years and pressure checks during annual servicing. |
Accreditations and consumer protections to check
When evaluating installers in England, Scotland, and Wales, verify that the installer holds appropriate industry accreditations.
- Microgeneration Certification Scheme (MCS): MCS certification demonstrates that the installer meets strict standards for quality and safety. While direct government grants for solar thermal vary, MCS certification is often required for compliance certificates and insurance validation.
- Consumer Code Membership: Look for installers registered with the Renewable Energy Consumer Code (RECC) or the Home Insulation and Energy Systems Contractors Scheme (HIES). These bodies enforce strict consumer protection rules, including deposit protection and clear contract terms.
- TrustMark: TrustMark registration indicates that the installer works to government-endorsed quality standards and has undergone independent vetting.
- Plumbing and Electrical Safety: Installers working on unvented hot water cylinders must hold a valid G3 building regulation qualification. Any electrical wiring for controllers or pumps should comply with Part P of the Building Regulations and be signed off by a registered electrician or NICEIC member.
Realistic installation timeline
A solar thermal installation involves both outdoor roofing work and indoor plumbing adjustments.
- Initial Survey and Quotation (Days 1 to 7): The installer assesses your roof pitch, shading, structural timber suitability, and cylinder location to provide a detailed technical quote.
- Component Ordering and Scaffolding (Weeks 2 to 3): Scaffolding is erected to allow safe roof access, and components including the twin-coil cylinder and collectors are delivered to site.
- Mechanical and Roofing Work (Days 1 to 2 of Installation): Roof tiles are lifted to secure solar mounting brackets directly to the rafters. Collectors are mounted, and flexible insulated stainless steel pipes are routed through the roof void down to the cylinder.
- Plumbing and Electrical Connection (Day 2 of Installation): The twin-coil cylinder is connected to the primary heating circuit and solar loop. The installer fills the solar loop with a high-temperature glycol mixture, flushes air from the system, and sets up the solar controller.
- Commissioning and Handover (End of Day 2): The installer tests system pressure, verifies sensor readings, and issues commissioning paperwork along with user manuals.
What this means for you
Installing solar thermal hot water provides a durable, reliable source of low-carbon hot water that reduces reliance on mains gas, oil, or direct electricity. By checking roof orientation, confirming space for a twin-coil cylinder, and choosing an MCS-certified installer, householders can ensure long-term performance with minimal maintenance.
If you are planning wider home efficiency upgrades alongside solar water heating, the Net Zero Home Scheme offers employees member pricing on accredited green home installations through participating UK employers without salary sacrifice or payroll deduction. Combining proper planning with certified installation ensures your home benefit upgrades deliver clear, lasting value.
Frequently asked questions
Do solar thermal panels still work in winter?
Yes, solar thermal collectors absorb solar radiation even on colder or overcast days. However, because daylight hours are shorter and the sun angle is lower, winter output is significantly lower than summer output. During winter, your primary heating system or boiler top-up will supply the bulk of your hot water demand, with solar pre-heating the cold water mains input.
How often does solar thermal fluid need to be replaced?
The fluid inside the solar loop is a specialized mixture of water and non-toxic propylene glycol designed to prevent freezing in winter and overheating in summer. Installers recommend testing the pH level and freeze protection level of the fluid every 3 to 5 years. The glycol solution typically requires complete replacement every 5 to 10 years to maintain corrosion protection.
Can I use solar thermal panels with a combination boiler?
Standard combi boilers heat water directly on demand and do not use a storage cylinder, making direct connection to solar thermal panels challenging. To use solar thermal with a combi boiler, you must either install a solar-compatible pre-heat cylinder upstream of the combi boiler or replace the combi boiler with a system boiler and dedicated solar hot water cylinder.
Sources
- Solar Water Heating Guidance, Energy Saving Trust
- MCS Standards and Microgeneration Installer Directory, Microgeneration Certification Scheme
- TrustMark Government Endorsed Quality, TrustMark
- Consumer Protection Code for Renewable Energy, Renewable Energy Consumer Code